Website Navigation
Making Complex Molding with Hand Tools
Making a Crown Molding Shelf
Here's a shelf I finished that is based on ithe type you see in Pottery Barn and Crate And B arrel. It's pretty much just a short run of crown molding with a solid back that's mounted to the wall. After seeing it in the catalog I thought it would be fun to make. I figured it would also give me an excuse to break out that set of Hollows+Rounds I have that don't get used enough. I'd never made any complex moldings with them, so this was a first for me. I Used several books as referen ces, as well as Ken Greenburg's d escription of the process
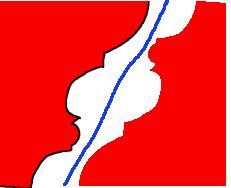
The first thing I did was sketch out an outline of the profile I wanted to create. I found s everal nice examples in some books on traditional woodworking, but eventually settled on somethin g I saw in "Modern Practical Joinery". My original plan called for a four foot long shelf, four i nches deep and four inches wide. I planned to glue up an extra-wide blank and cut two shelves ou t of it. something like this:
Unfortunately this didn't work out exactly as planned. After jointing and gluing up the blank I wasn't left with a thick enough blank to cut two shelves, so I wound up making one set, and re moving more wood that I should have, had I planned it better from the beginning. Live and learn!
My next step was to create the blank. I chose to use poplar because it's easy to work with hand tools, yet is hard enough so it doesn't ding ea sily. Since the shelf was going to be painted, the greenish color of poplar wouldn't matter. Poplar is also relatively inexpensive and easy to find in thick pieces.
My first step was make one face of each board flat. To do this I used a scrub plane, jack, a nd fore plane, in conjunction with winding sticks.
&
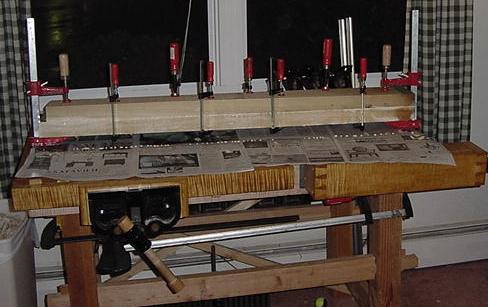
After I had a flat face on each board I glued them together to create the blank. You can see my new tail vise in this picture :)
The next morning I made one face flat and straight, again using the scrub, jack, jointer combi nation in conjunction with winding sticks.
Next, I proceeded to hog off a majority of the waste using a hatchet, drawknife, and finally my scrub plane. Since the blank was over-sized due to my earlier miscalculation I had to remove a lot more wood than I should have. I found I could remove a large amount of wood in little time with the "rough" tools like a hatchet and drawknife, but as I got closer and closer to my scribe d lines I moved to finer and more precise tools like the scrub. I don't usually consider a scrub plane a precise tool, but compared to a hatchet it sure is. Next I plowed a 1/8" groove to deli neate where the top cove would start. This groove served as a reference point as I removed the rest of the waste
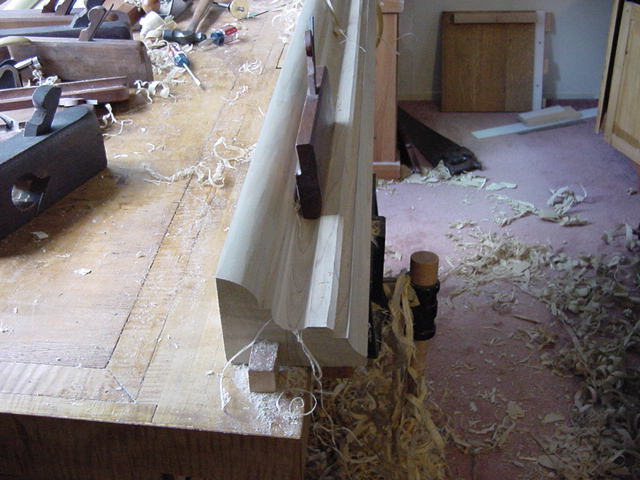
As outlined in Ken's description, I then cut several "steps" in the blank, each delineating a start or end point of major feature. I used several planes to do this including a #10, #46, a wo oden moving filletster, but what I found to work the best was a pair of massive wooden skewed rab bet planes: one measuring 1 1/4" wide, the other 2" wide. The other planes worked OK, but I foun d as I descended deeper and deeper into the cut the other planes either bottomed out (46, fillets ter) or become difficult to hold (10). Also, the skewed blade of the wooden rabbet planes greatl y reduced the force it took to push the plane through the stock, enabling me to set the blade for a more rank cut to take off more material at a time.
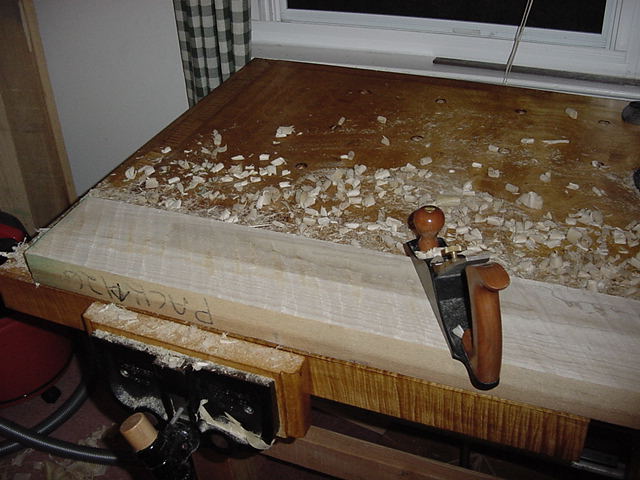
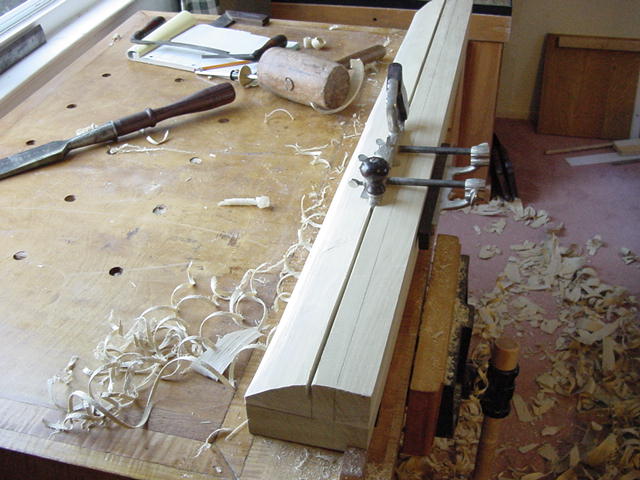
Here's a closeup of the "steps" after I was done. Note that the dark vertical line is a scrib e mark, not a glue joint. The glue joint runs horizontally as can be seen in the differentiation in growth rings in the end grain.
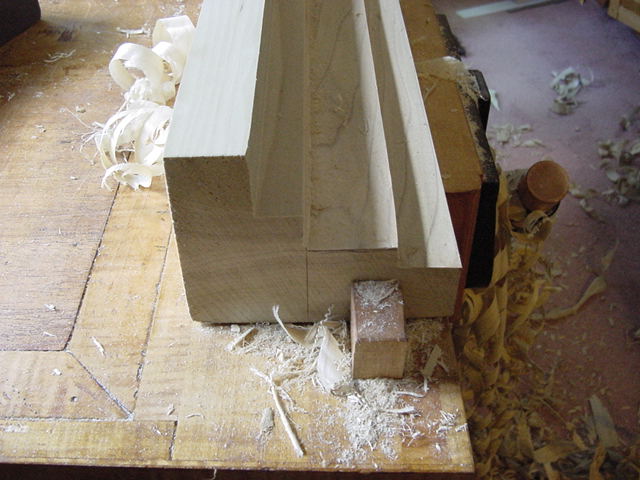
&n bsp;
Next I began defining each "feature" starting with the small cove on the right. First I scrib ed the dimensions of the cove (3/4") and used my scrub plane to remove the bulk of the waste, res ulting in a wide champher as seen here:
I then Used a #10 round to finish up the cove, working just until the cove met the lines I scr ibed earlier:

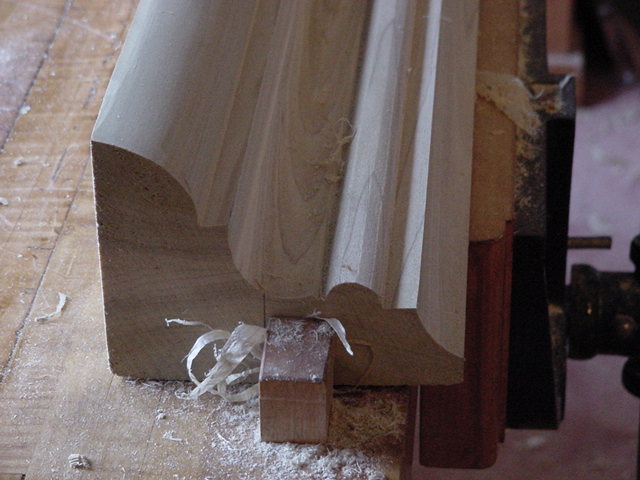
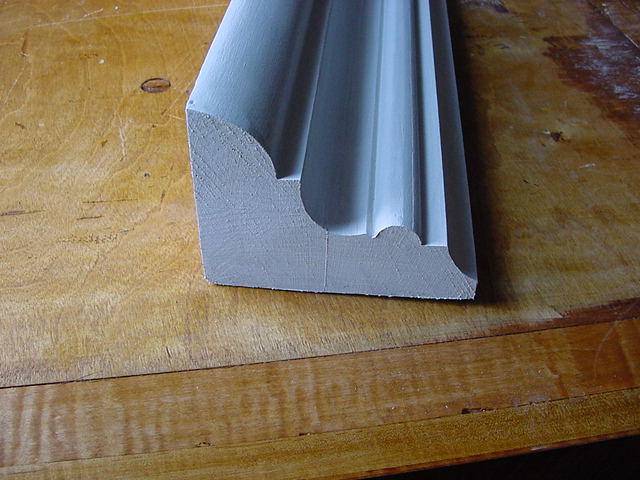
Next I skipped ahead a bit and worked on the large thumbnail or ogee on the far left. I didn' t take any pictures of the process, but it involved the same steps as above, removing most of the waste with the scrub, and finishing up with a #16 hollow.
The large cove was next. There was no easy way to remove the waste from this section, so I s tarted with a small #8 round, and worked my way up to a #14 round each time gradually expanding t he cove until I reached the desired depth and width.
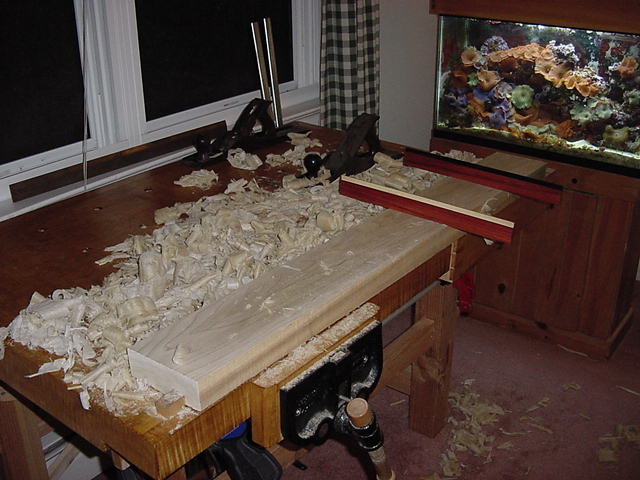
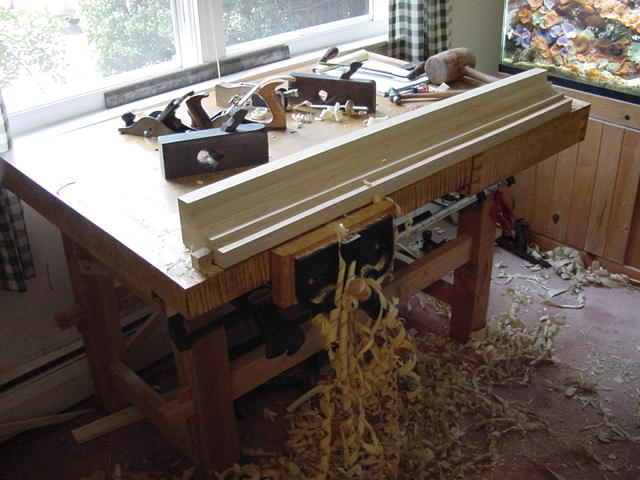
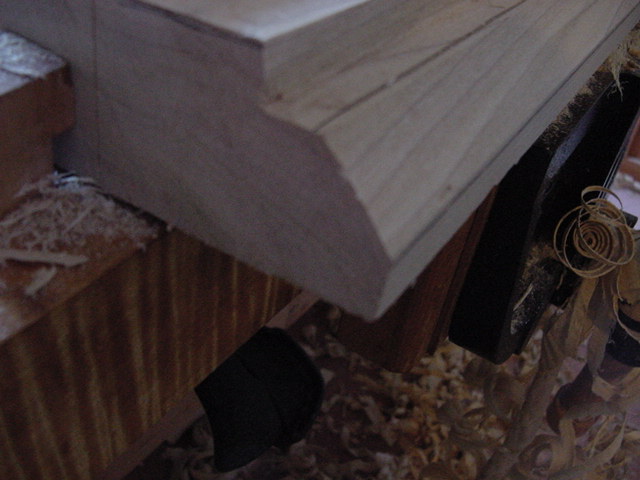
With the cove clearly defined I then formed the astragal with a #8 hollow working the plane f rom different angles to form the entire 180 degrees of the feature. Originally there was suppose d to be a fillet on both sides of the astragal, but after finishing with the hollow plane I was l eft with a quirk which I liked, so I left it. Now the profile was finished:
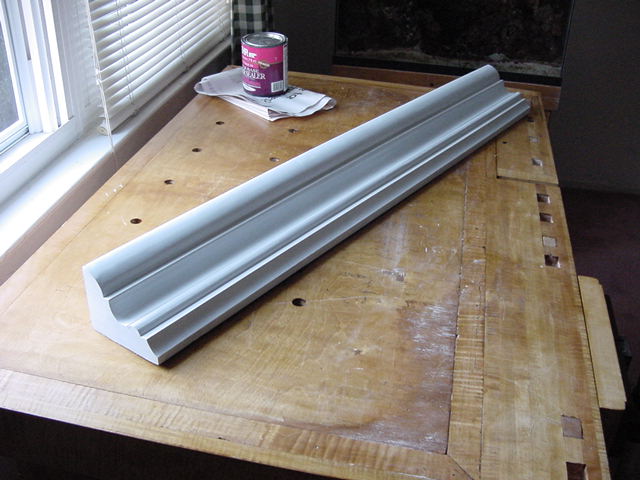
I finished up by sanding going through 100-220 grits. I then gave it a coat of water-based p rimer, and two coats of a semi-gloss water-based paint. I know, I know.. that sounds like Norm. . I should have used milk paint :)
Here's how it looked after the primer coat.
OutTakes:
OutTakes:
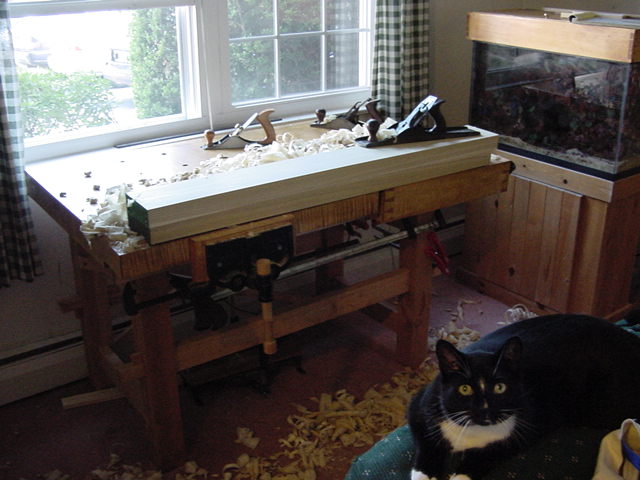
Here's my cat Arthur telling me in his own way it's way too early to be jointing:
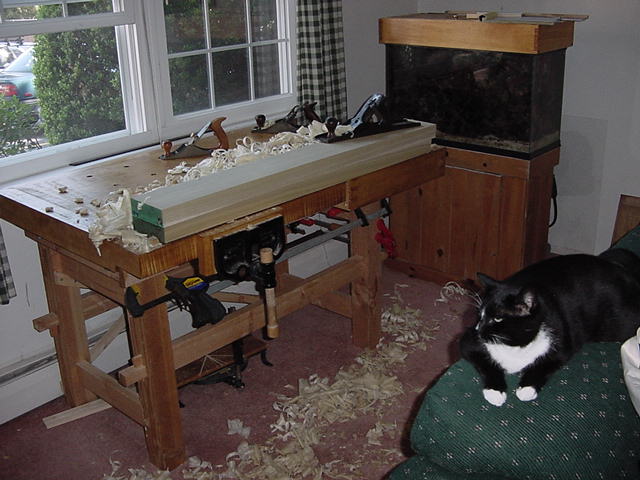
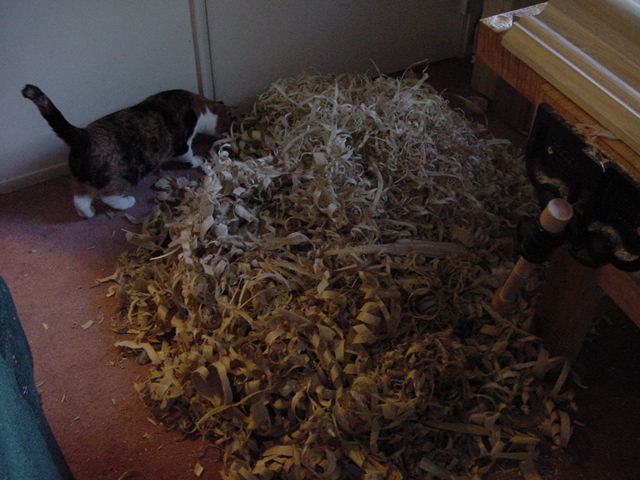
And here's Gwen standing next to the massive pile of shavings on my livingroom floor. Needles s to say SWMBO was away that weekend.